Documentation
*TODO:
- adjust whatever script changes were made (fields etc)
- add info about adjusting tooltip directly from editor
- add info about seeing and controlling flow from editor*
# VR Training - Controllers Onboarding
## Quick Start - Unity XR Toolkit (Unity 2020.3)
1) Import XR Interaction Toolkit (version 2.0.0-pre.5)
> You need to enable 'preview' packages from package-manager -> advanced section
> Accept to use new input system when asked
> Make sure new input system is used `File -> Project Settings -> Player -> Other Settings -> Active Input Handling` - should be set to `Input System Package (New)` or `Both`
2) Configure XR as needed for your project / headsets support
> For demo purposes click `Edit -> Project Settings -> XR Plugin Management -> Install XR Plugin Management` then choose `OpenXR`. Next in `OpenXR -> Features` specify profile to use, eg `Oculus Touch Controller Profile`
3) Add Scripting Define Symbol: `VRControllersOnboarding_Integrations_XRToolkit`
> `File -> Project Settings -> Player -> Other Settings -> Script Compilation section` - after adding make sure to click `Apply`
4) Run demo from `VRControllersOnboarding\Examples\Demo\DemoUnityXRToolkit`
5) Hit play, once controllers appear the demo onboarding will start automatically
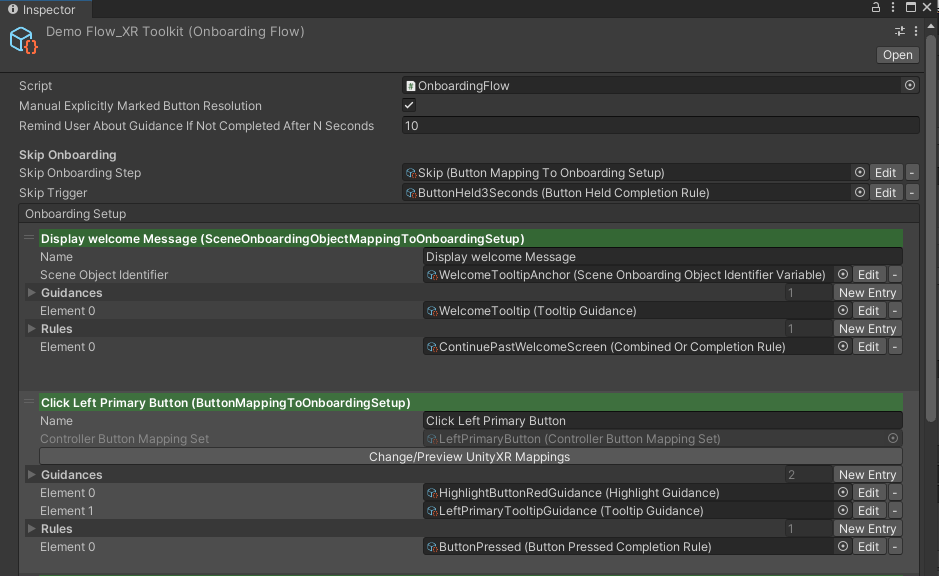
# Onboarding Flow - Customisations
>To edit demo one please find `DemoFlow_XRToolkit` in `VRControllersOnboarding\Examples\Assets\OnboardingFlow`
`Onboarding Flow` can be easily configured using editor.
**Rearranging Steps**
You can change step order by simply dragging and dropping steps in the editor.
**Removing Steps**
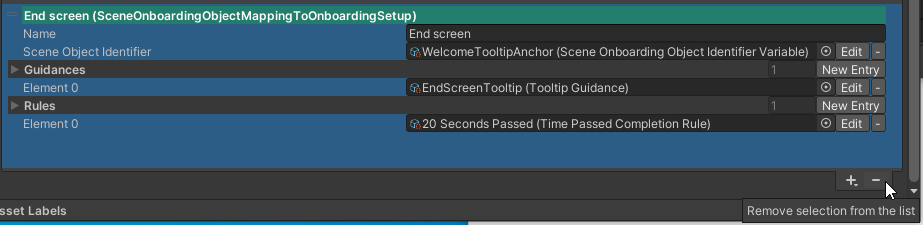
Select step to remove and click `-` at the bottom of inspector (might need to scroll down)
**Adding Steps**
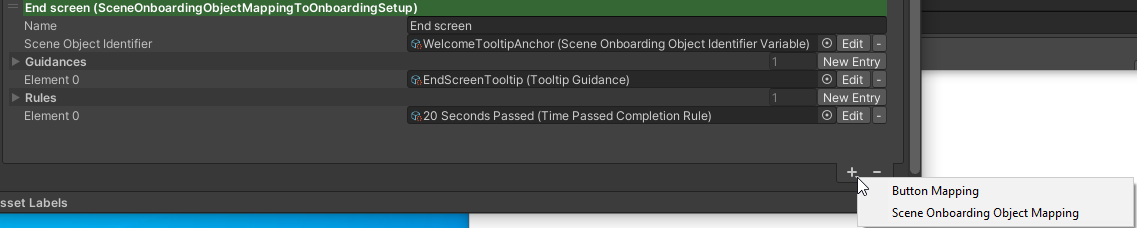
Steps can be added from `+` at the bottom of inspector
There are 2 `OnboardingStep` types that you can use:
- `Button Mapping` - step that'll directly resolve to specifc controller button
- `Scene Onboarding Object Mappings` - step that maps to some specific game object by marking it via `SceneOnboardingObject`
## Onboarding Step - Button Mapping
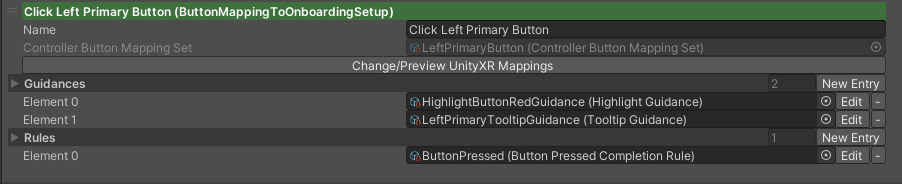
Button mappings link directly to controller buttons. They'll work out which input system you're using (UnityXR / New Action Based Input System / SteamVR)
and how to resolve button game-object (eg. for chaning highlight color, attaching tooltip, etc). All you have to do is specify which `ControllerButtonMappingSet` is to be used.
To do that click `Change/Preview Unity XR Mapping`
**Button Mappings Preview**
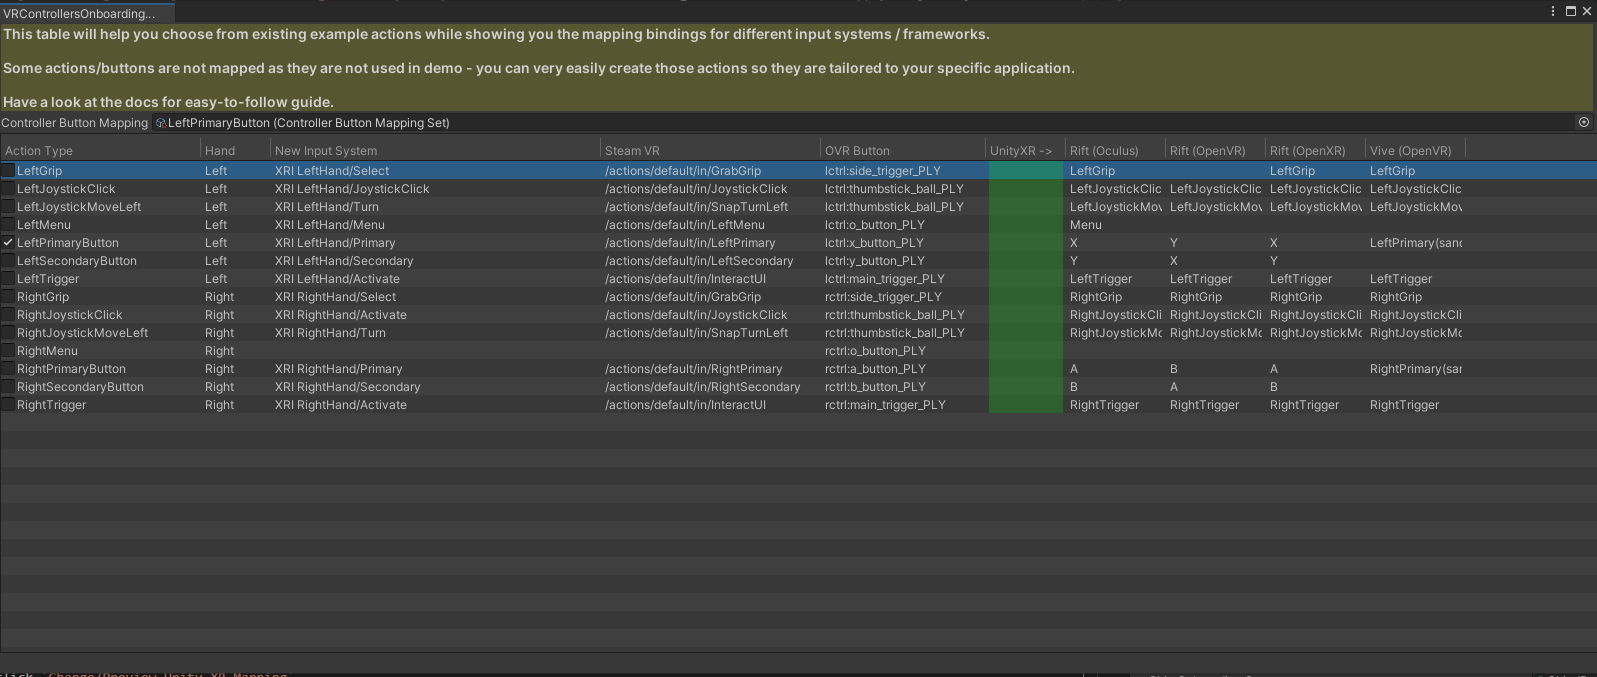
Between different VR frameworks mappings can get quite complex, the tool will take care of that complexity and will present you with easy-to-understand
mapping table. All you have to do is pick mapping that you want to bind to.
In this example we're going to bind to `LeftPrimaryButton` - to break columns further
- `Hand` - indicates which controller `Left` or `Right` the mapping is for
- `NewInputSystem` - path for New Unity Input system that uses action-based bindings
- `Steam VR`- path for SteamVR action
- `OVR Button` - if using Oculus Integration (OVR) - this is button name that will be found on in-scene controller model (while using `CustomControllers` as those have per-button meshes)
- `Unity XR` - delimits secion for older UnityXR mappings, those are mapped as per `https://docs.unity3d.com/Manual/xr_input.html` page
- `Rift (Oculus)` - a unity XR specific mappings, those are pulled from `VRControllersOnboarding\Assets\UnityXRControllerMappings` - presented in easy to digest form.
> Mappings can be easily adjusted to correctly reflect your own NewInputSystem / SteamVR bindings - more on that later
> You can easily add more controller types and those will be displayed as columns (more on that later)
## Onboarding Step - Guidances
As part of your `OnboardingStep` one or more `OnboardingGuidances` can be executed, this element will help you customise how user is guided to perform action.
There are few inbuilt guidances
### Onboarding Step - Guidances - Highlight

Targetted item will change material to one specified in `Highlight Material`.
Additionally if user don't perform required action in timelly manner - the guidance will try to grab user attention. `HighlightGuidance` do that by flashing button, next 2 options control how many times button will flash and how long between material changes.
> Guidances trigger `GrabUserAttention` if user did not perform specified action in `RemindUserAboutGuidanceIfNotCompleterAfterNSeconds` (as confugured on onboarding flow)
> action completion is controlled by `CompletionRules` - more on that later
### Onboarding Step - Guidances - Tooltip
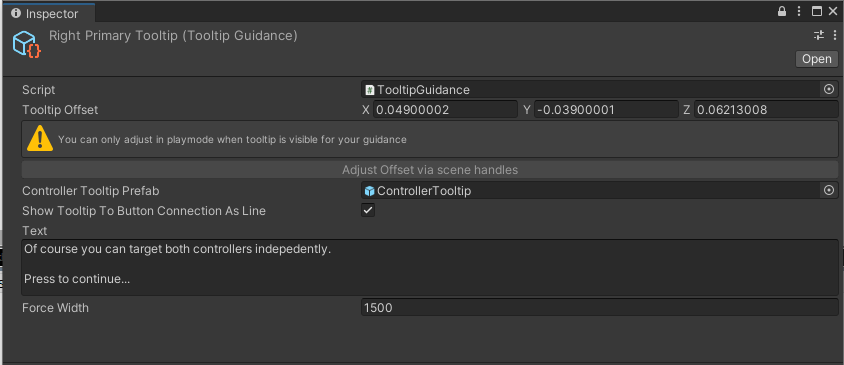
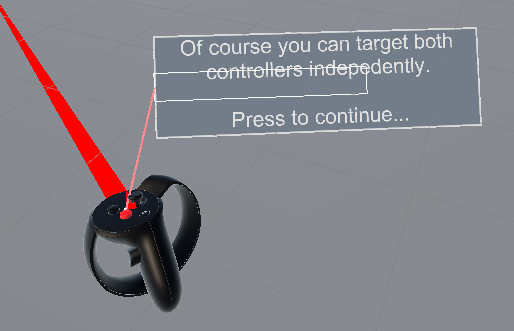
Tooltip guidance will display desired text attached to found element.
- `Tooltip Offset` - offset from found element
- `Adjust Offset via scene handles` - adjusting offset can be done in much simpler way by clicking on that button and adjusting directly via scene-view handles - this will allow you to see the effects immediately
- `ControllerTooltipPrefab` - base prefab that can be adjusted if you want to change properties like background color, font sizes / style, etc
- `Show Tooltip To Button Connection As Line` - controls whether tooltip box is connected to found element with Line
- `Text` - tooltip text, line breaks will be also applied to tooltip
- `Force Width` - if specified it'll force specific tooltip width
### Onboarding Step - Guidances - Custom
You can create your own guidance by subclassing `OnboardingGuidance` and providing implementation for:
- `StartGuidanceInternal` - which is called when guidance is first started
- `ProcessUpdateInternal` - fired on every Update
- `StopGuidanceInternal` - once step is finished this method is fired to clean up any changes `Guidance` may have made
- `RenderUserAttentionGrabberAfterTooMuchTimePassedCoroutine` - a coroutine that's run in response to user not completing step in defined time
## Onboarding Step - Completion Rules
Step is considered completed if ALL rules are satisfied, there are few built-in rules that can be used
### Onboarding Step - Completion Rules - Button Pressed
Very simple rule that'll be considered satisified if button has been pressed.
### Onboarding Step - Completion Rules - Button Held
A variation of button pressed but user will be required to hold button for customised `HoldForNSecondsToTrigger`
### Onboarding Step - Completion Rules - Time Passed
This rull will be satisfied after predefined amount of time. Useful for things like welcome screen where user is not required to perform any action
### Onboarding Step - Completion Rules - Joystick Moved
Satisfied if user moved controller joystick outside of specified `LeftRight` and `UpDown` thresholds
### Onboarding Step - Completion Rules - Object Moved
Checks if found object has been moved further than specified `DistanceToConsiderSatisfied` - this can be useful with some more complex steps, eg. throw object away
### Onboarding Step - Completion Rules - Custom Signal
If you don't want to create custom rule that'll run to check if satified you can rely on this rule to work with some predefined event.
Use `CustomSignalEmitter` via it's public `Emit` method to trigger.
### Onboarding Step - Completion Rules - Combined OR
The rules specified in the step are having an AND requirement, meaning step will continue only if all rules are satisfied.
This is sometimes not enough for example during a welcome screen user is expected to press a button
OR perhaps you also want to make sure they don't get stuck and workflow will consider regardless of their action after 30 seconds.
With that scenarion you can use CombineOR rule with `AnyOfCompletionRules` set to
- `ButtonPressed`
- `30SecondsPassed`
### Onboarding Step - Completion Rules - Custom
You can create your own custom rule by subclassing `OnboardingActionCompletionRule` and providing implementation for abstract `IsRuleSatisfied` method.
## Onboarding Step - Scene Onboarding Object Mapping
In addition to `ButtonMapping` whole step can be of `SceneOnboardingObjectMapping` - this is designed for elements that can not be resolved automatically to buttons, eg. a granade that user is expected to throw
- `Scene Object Identifier` - to find the element you have to choose identifier, that same identifier is also applied to specific game-object to `SceneOnboardingObject` script
Rules and guidances will be executed in same way as for `ButtonMapping`, some built in scripts will not work, eg. `ButtonPressedCompletionRule`, etc. as they rely specifically on button being present.
# Configuring Controller Mappings
As mentioned earlier mappings between different controllers and different VR frameworks get complex really quick. Asset has been designed in a way to easily allow you to customise mappings
for both current and future headsets.
Main construct that is used for bindings is `ControllerButtonMappingSet` - think of it as grouping for different frameworks that link to same action, directly on it you can configure:
- `NewInputSystemAction` - this is action-based Unity way of abstracting input
- `OVRButtonName` - name of actual game object that represents button while using Oculus Integration
- `SteamVRAction` - SteamVR Action as configured in your project
- `Mapping Notes` - anything specific to mapping that you'd like to be known, eg. some older Unity XR mappings do not exist - like menu item on right-hand controller
- `UnityXRControllerbuttonMappingEntries` - a list of all available UnityXR mappings (more on that in next section)
You can add and remove `ControllerButtonMappingSet` as needed for your application, they'll then correctly display in Button Mappings Preview.
## Configuring Controller Mappings - Unity XR
Unity XR is an older way how XR mappings have been handled, they are all listed in `https://docs.unity3d.com/Manual/xr_input.html` - this way is far from perfect
and requires you to have some knowledge of how different buttons were mapped to pre-defined-enum-actions on different headset.
`ControllerMappings` are direct representation of that.
Asset will resolve which `ControllerMappings` to use based on `DeviceNameMatchingRegex` field, that's then compared with `InputDevices.GetDeviceAtXRNode([hand]).name`.
Once `ControllerMappings` element is resolved (eg Rift controllers [using Oculus integration package]) - per button entries can then correctly match unity-predefined-enum-values and be used with UnityXR input system.
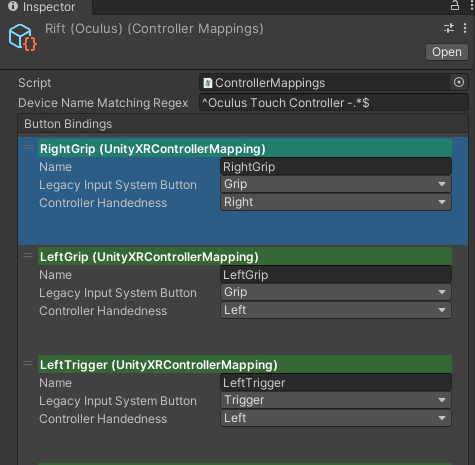
In this example we can see 3 buttons
`RightGrip` - which is bound to `LegacyInputSystemButton` (that's unity predefined-enum) - Grip, and `ControllerHandedness` - Right
`LeftGrip` - set in very similar manner with different handedness
`LeftTrigger` - which is bound to `LegacyInputSystemButton` (that's unity predefined-enum) - Trigger
This is all simply mapped as unity-xr mapping page specifies
## Configuring Controller Mappings - Unity XR - Adding new controller
1) Create new `ControllerMapping`

2) Populate `DeviceNameMatchingRegex` to one that uniquely identifies your controller
3) Add Button Bindings and configure as per unity help page
> Generally you should not use this input method for new projects. Those are handled for backwards compatibility only.
4) Adjust all `ControllerButtonMappingSet` entries to contain your new mapping in `UnityXRControllerbuttonMappingEntries`
5) Now you'll be able to see your new device mappings in `Button Mappings Preview` window
# Onboarding Flow - Skip
User can skip onboarding at any stage, this is configured via `SkipOnboardingStep` and `SkipTrigger`.
# Handling Onboarding Flow Events
Workflow will fire events on important actions like step change, flow skipped, rule satisfied. You can use `OnboardingFlowEvents` script to handle those.
This is can be used if you need to run some custom code to perform step-setup (before it's execution) or perhaps clean up (after execution).
100% satisfaction guaranteed or Your money back!
Get On Asset StoreProducts
(click to find out more)
Fast Script Reload
1. Play 2. Make change 3. See results

(click to find out more)
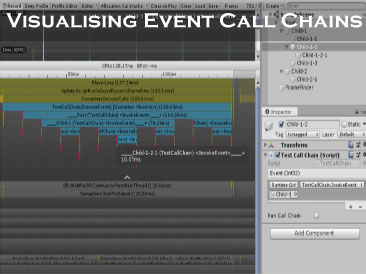
Transform Changes Debugger
Any change, any transform, any frame
(click to find out more)
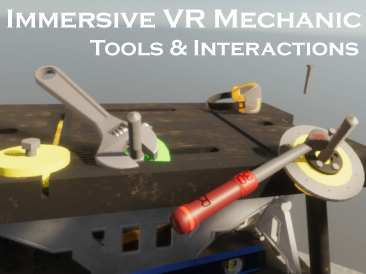
Immersive VR Mechanic
Tools and Interactions
(click to find out more)
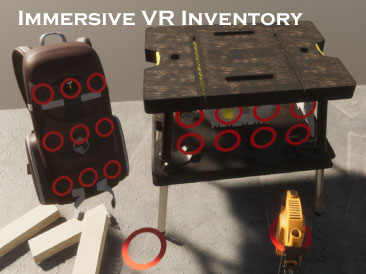
Immersive VR Inventory
(Backpack / Holsters / Containers)
(click to find out more)
Remote hands tracking
for Oculus Quest
(click to find out more)
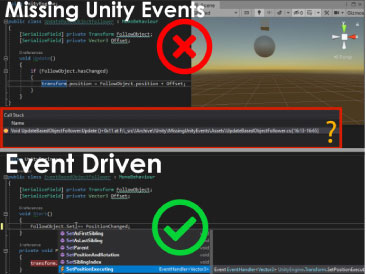
Missing Unity Events
What is changing my transform?

(click to find out more)
Transfrom Setter Interceptor
What is changing my transform?
(click to find out more)